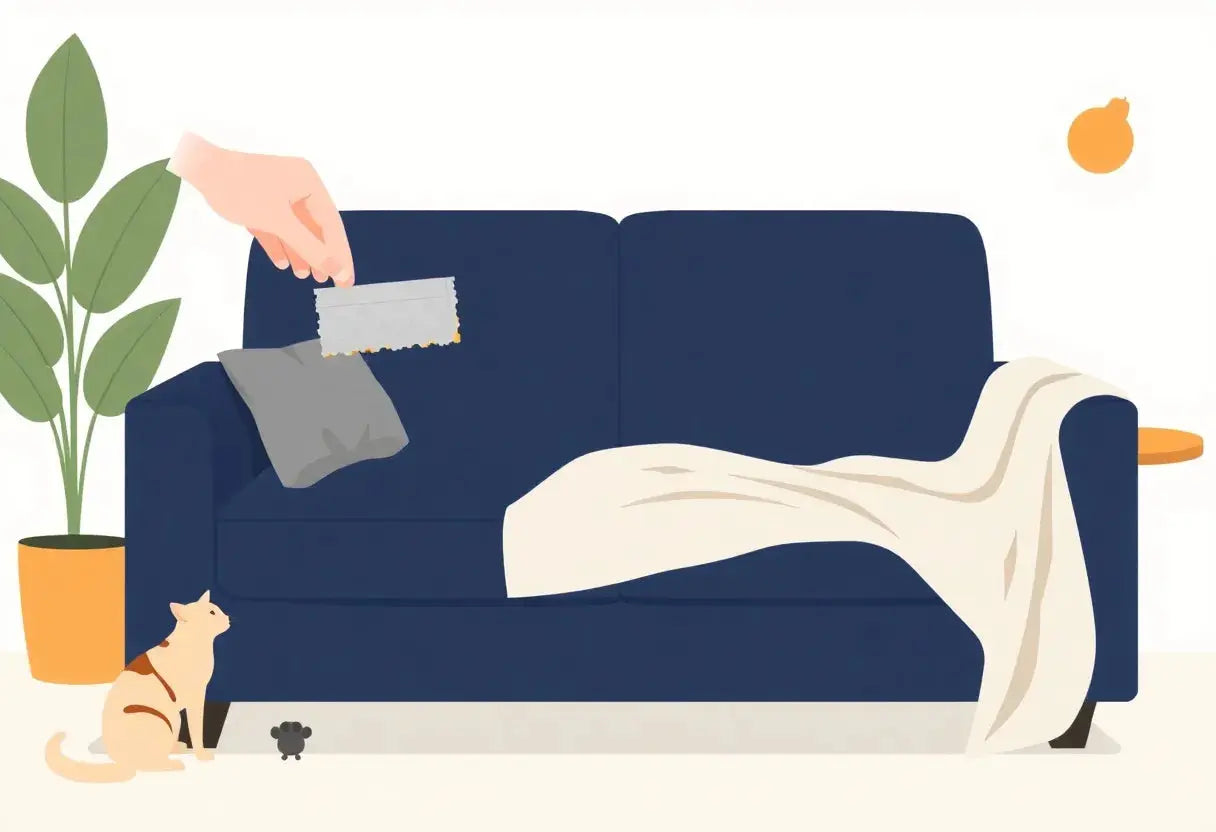
One tiny rip in your sofa cover can make the whole room feel messy. With kids bouncing, pets digging in, and guests dropping by, that tear never stays small for long.
If you have been searching for a sofa cover repair that is fast, clean, and budget friendly, you are not alone. Sewing takes time, and replacements can cost more than they should.
In this post, you will learn how waterproof repair tape can fix the damage in minutes and help your furniture look polished again. We will also cover how to fix a torn couch cover so it blends in, plus smart tips to protect your space with an anti-scratch couch cover, with a subtle touch of French inspired style.
First, let’s look at why sofa covers tear and how to choose the right tape for the job.
First, Check the Tear: What You Can Fix (and What Needs a Replacement)
Before you reach for waterproof repair tape, take two minutes to assess the damage. This quick check helps you choose the right approach for a long lasting sofa cover repair, and it prevents the most common frustration: a patch that peels because the fabric or the location needed extra support.
Think of this as your calm, practical pre-flight checklist. Once you know what you are working with, the actual fix (coming up in the step by step section) becomes almost effortless.
1) Identify the fabric type (because adhesion is not one size fits all)
Different sofa covers accept adhesive differently, especially when kids and pets have already stretched the fabric a bit.
- Stretch knit or spandex blends (often on fitted slipcovers): These move a lot. You will need a tape that stays flexible so the repair bends with the cover instead of popping off at the edges. If the cover is very stretchy, prioritize hold over invisibility.
- Polyester blends: Usually the easiest for waterproof repair tape. They tend to bond well and resist soaking up moisture, which helps the adhesive grip.
- Cotton or cotton blend canvas: Cotton can absorb cleaning moisture and skin oils, so prep and drying time matter more. If you patch too soon, the adhesive can fail early.
- Velvet look or brushed fabrics (including microfiber styles): These can be tricky because the surface texture reduces contact area. A cleaner finish often comes from taping on the inside, then gently smoothing the nap on the outside.
Actionable tip: If you are unsure what the fabric is, check the care label. It often lists the fiber blend (polyester, elastane, cotton). That small detail tells you whether your repair needs extra flexibility or extra surface prep.
2) Measure the tear and note the location (stress zones change the plan)
Grab a measuring tape or even a ruler. Tear length matters, but location matters more.
- Low-stress areas (best case): Backrest panels, outer sides, and the skirt area. A small straight tear here is usually the easiest win for tape.
-
High-stress areas (needs reinforcement):
- Seat front edge: Fabric gets pulled every time someone stands up.
- Armrests: Constant rubbing, plus pets love to perch here.
- Cushion seams and zipper zones: Tension concentrates along stitch lines.
Use this simple rule for a stronger sofa cover repair: the more the fabric stretches, sits on, or gets grabbed, the more you should plan for layered reinforcement (not just one strip).
Data backed examples from real-life tear patterns:
- Small straight tear on the backrest: Best case for tape, often nearly invisible when patched from the inside.
- Long rip on the seat edge: Fixable, but expect to reinforce with multiple pieces so the tear does not reopen during daily use.
- Split seam: Usually better handled with stitching or seam tape first, then use waterproof repair tape as a backup stabilizer.
3) Check for fraying, thinning, and pet “bald spots”
This is the part busy households often miss. If the fabric around the tear is compromised, the tape may hold, but the cover can continue splitting right next to the patch.
Look closely for:
- Frayed threads at the edges of the tear
- Thinning fabric that feels papery or overly soft
- Bald spots from pet claws where the weave is worn down
What this means for how to fix a torn couch cover:
- If the fabric still feels strong, tape can stop the tear from spreading quickly.
- If the fabric is very thin or worn, tape can stabilize it temporarily, but you should treat it as a bridge solution while you plan a more durable upgrade.
If pet damage is the root cause, consider pairing the repair with a tougher protective layer afterward. An anti-scratch couch cover can take the daily claw contact so your repaired spot is not under constant attack. Here is a helpful option for pet-heavy homes: Anti-Scratch Couch Covers for pet-heavy homes.
4) Decide your goal: invisible look or strong hold (sometimes you cannot get both)
A perfectly hidden patch is possible in some situations, but not all. Choosing your priority now saves time later.
- Choose “invisible” when: The tear is small, straight, and in a low-stress zone. Patching on the inside usually looks cleanest.
- Choose “strong hold” when: The tear is on a seat edge, armrest, or seam line. You may need visible reinforcement or a layered patch approach. It is better to have a slightly noticeable repair than a rip that reopens during movie night.
Quick decision prompt: If this spot gets tugged daily (kids climbing, pets jumping, people sitting), choose strength first. You can always add a throw or cushions later to keep the room feeling polished and elegant.
If your tear passes this checklist (fabric still has strength, edges can align, and you are ready to prioritize either a clean look or a reinforced hold), you are in great shape for a fast fix. Next, we will choose the right waterproof repair tape so it sticks smoothly and stays put through real life use.

Choose the Right Waterproof Repair Tape (So It Sticks and Stays)
Once you have checked the tear and confirmed it is a good candidate for a quick fix, the next step is choosing a waterproof repair tape that will actually hold up to real life: kids climbing, pets nesting, and the everyday stretch and pull of a slipcover. The right tape makes your sofa cover repair feel calm and effortless. The wrong one can peel, pucker, or even create a new tear right at the edge of the patch.
Here is a practical mini guide to help you pick wisely, without overthinking it.
1) Prioritize strong adhesive plus a flexible backing
A sofa cover moves constantly, especially if it is a stretch knit or a fitted slipcover. Look for tape that is designed to flex with the fabric rather than sitting stiffly on top of it.
- Best for: stretch covers, seat areas, armrests, cushion corners
- What to avoid: very rigid patches that feel like plastic once applied, because when the cover stretches, the tape edge becomes a stress point and the fabric can start tearing right beside it.
If you are researching how to fix a torn couch cover that stretches, flexibility is the feature that matters most.
2) Match the finish to your fabric (matte usually wins)
Finish is not just aesthetics, it is camouflage.
- Matte finish: blends better with most woven, knit, and textured sofa covers
- Glossy finish: can reflect light and draw the eye straight to the patch, especially on large flat areas like a backrest panel
A simple rule: if your cover is not shiny, your tape should not be either.
3) Color match matters more than brand
It is tempting to chase a specific brand name, but for a repair that looks polished, shade matching matters more.
Practical matching tips (quick and reliable):
- Textured patterns or busy weaves: clear waterproof tape can disappear surprisingly well because the pattern does the hiding for you.
- Dark solid covers: black or charcoal gray tape often blends better than clear, which can look glossy against dark fabric.
- Light covers: test first on an inside hem or hidden edge. Some tapes look slightly cloudy on pale textiles.
If the tear is in a visible spot and you cannot get a close match, consider using the tape on the inside of the cover whenever possible. You will still get strength, but with a cleaner look from the outside.
4) Be careful with tapes that stiffen after curing
Some waterproof tapes cure into a firm patch. That can be fine for items that do not move much, but sofa covers are under tension, especially across seat cushions.
- If your cover has stretch, a stiff patch can cause the fabric to pull awkwardly, leading to puckering now and possible edge tearing later.
- For high movement areas, choose a tape that stays supple so the repair behaves more like fabric and less like a hard plate.
A quick “which tape should I use?” cheat sheet
Use this as a fast decision tool before you buy:
- Patterned or textured cover: start with clear waterproof tape (the pattern hides the seam)
- Dark solid cover: black or gray tape tends to look more seamless than clear
- Light solid cover: test on an inside hem first, then decide whether to patch inside for invisibility
- Stretch slipcover: flexible backing is non negotiable, skip anything that turns stiff
And one more gentle reminder for busy homes: if you are dealing with frequent juice spills, muddy paws, or snack accidents alongside rips, you may want to zoom out from repairs and consider full coverage protection. Our guide to Waterproof Sofa Covers is a helpful next step if spills are the bigger issue than tearing.
Next, we will get hands-on with the exact method: cleaning, aligning, and applying tape so the repair looks smooth and holds up, even in high stress zones.
Step-by-Step: Repair a Torn Sofa Cover with Waterproof Tape (Clean, Smooth, Reinforce)
When life happens (a playful pup, a busy toddler, a sharp belt buckle), a quick sofa cover repair can keep your living room looking calm and cared for. Here is exactly how to fix a torn couch cover using waterproof repair tape, with a finish that stays neat even in high use spots.
-
Remove the cover (if possible)
- Take the cover off the sofa or cushion so you are not taping over hidden trouble like crumbs, lint, pet hair, or stretched wrinkles.
- If the cover cannot be removed, slide a piece of cardboard or a cutting mat inside the cover behind the tear so you do not accidentally stick tape to the cushion.
Pro tip: A quick pass with a lint roller around the tear makes a surprisingly big difference in how well adhesive grabs.
-
Clean the area and dry it completely
- Use mild soap and water on a soft cloth, gently cleaning 1 to 2 inches around the tear.
- Rinse with a clean damp cloth, then let it air dry fully.
Why this matters: Adhesive fails fast on damp fabric or on fabrics coated with body oils, pet dander, or cleaning residue. For waterproof repair tape to bond well, the surface must be clean and dry.
-
Align the tear edges so the pattern lines up
- Bring the torn edges together like puzzle pieces. Match stripes, weaves, or texture direction so the repair looks natural.
- Use small clips or painter’s tape on the outside to hold the alignment in place while you work.
Pro tip: If the fabric is fraying, trim only the loose fuzz (do not cut deeper). Over-trimming can widen the gap and make the patch more visible.
-
Apply tape on the inside first for a cleaner look
- Flip the cover inside out.
- Cut a piece of waterproof repair tape that extends beyond the tear. A practical rule: for a 2-inch rip, use tape that reaches at least 1 inch past each end (so about 4 inches total length). This reduces stress at the tear tips where rips like to spread.
- Place the tape over the tear from the inside, then press firmly.
Pro tip for a smooth finish: Press from the center outward to push out air and prevent bubbles or puckering. If your cover is stretchy, keep it relaxed (not stretched) while applying.
-
Reinforce high stress areas with a cross patch
- If the tear is on a seat front edge or armrest, add a second shorter strip perpendicular to the tear, forming a simple cross.
- This “cross-patch” spreads tension in multiple directions, which is especially helpful where people sit down, stand up, or where pets perch.
Example: An armrest tear often reopens because the fabric is pulled sideways. A cross-patch helps resist that repeated tug.
-
Warm-set carefully (only if the tape instructions allow)
- Some tapes bond better with gentle warmth. If allowed, use a hair dryer on low heat for a short burst, moving constantly.
- Avoid overheating, especially on synthetic blends, which can warp or shine.
Safety note: Ventilate the room and follow household chemical safety basics when using adhesives and heat nearby.
-
Let it cure before reinstalling and stretching
- Give the repair time to set based on the tape’s instructions (often several hours).
- Only then put the cover back on and smooth it into place. Stretching too soon can lift edges before the bond fully strengthens.
Pro tip: After reinstalling, press along the repaired area again through the fabric to “seat” the adhesive, especially on textured weaves.
A smart next move: protect the spot that failed first
If the rip happened on an armrest or cushion edge, that zone will likely wear again. After you complete the sofa cover repair, consider adding targeted protection so your quick fix lasts longer. These Armrest and Cushion Covers are designed for high wear areas and pair beautifully with a family home that still wants a polished look:
Armrest and Cushion Covers to protect high-wear zones
Next, we will make the repair look even more elegant, so the patch blends in and your sofa feels “pulled together” again in minutes.

Make It Look Elegant: Hide the Patch and Upgrade the Style in Minutes
A practical sofa cover repair should never leave your living room looking like a DIY emergency. The good news: when you use waterproof repair tape correctly, you can often make the fix nearly disappear, then style the sofa so your eye goes to the cozy details, not the former tear.
Here are a few fast, family-friendly ways to make the repair feel intentional and refined, with that soft French-inspired ease.
1) Start with the “invisible” approach: patch inside, then smooth outside
If you are still in the “how to fix a torn couch cover” phase and want the cleanest finish, the inside patch is your best friend.
- Apply waterproof repair tape on the inside whenever possible (as you did in the repair steps), because it supports the fabric without adding shine or texture to the visible surface.
- Then, on the outside, gently smooth the fabric over the tear so the weave and pattern settle back into place.
- Pro tip for a cleaner look: lightly press along the tear line with your fingers from the center outward to relax any rippling. A flat, aligned surface makes the repair look far more discreet than a perfectly centered patch.
Why this works: most people notice texture changes before they notice a tiny line. Keeping the outside texture consistent is the quickest route to “you would never know it happened.”
2) Use a throw to redirect attention from high-wear zones (and make it feel styled)
Even a well-done tape fix can be more visible on high-stress spots like the seat front edge or the armrest. A throw is the simplest way to draw the eye away from those zones while adding warmth and polish.
Mini formula (fast and elegant):
- Choose a throw in a matching tone to your sofa cover (cream on cream, gray on gray, beige on sand).
- Pick texture, not loud pattern: think linen-look, light waffle, or soft bouclé feel.
- Drape it where life happens most: across the seat edge, over the arm where pets perch, or folded along the backrest if the tear is higher.
Style example (French-inspired and clean): pair a neutral sofa cover with a layered textile look, like a linen-look throw plus two contrasting pillows. It reads intentional, not like you are hiding a patch.
For an easy refresh, browse Throws and Blankets for a quick style refresh.
3) “Reset” the whole color story with pillow covers (so imperfections blend in)
If the cover has a bit of overall wear, a small repaired spot can stand out simply because the room feels visually flat. Pillows create a new focal point in minutes.
Try this simple 3-pillow reset:
- 2 pillows in a shade close to the sofa cover (they help the sofa look unified)
- 1 accent pillow in a deeper tone (this pulls attention upward and away from the repaired area)
Quick tip: if your tape repair sits on a seat cushion, choose pillows with a little texture (slub, embroidery, or a subtle weave). Texture makes tiny irregularities in the sofa fabric look like part of a relaxed, lived-in finish.
4) If the cover is aging: treat the tape repair as a bridge, not a forever fix
Waterproof repair tape can be surprisingly durable, especially when applied inside and reinforced in stress zones. Still, if the fabric is thinning or multiple areas are wearing out, think of this as a smart bridge solution:
- Use the repair to stop the tear from spreading now (so you avoid a bigger rip and exposed cushion inserts).
- Then plan your next step: a refreshed look that better fits real life with kids and pets.
This is also the moment to consider whether your household needs a tougher daily layer, like an anti-scratch couch cover, so you are not repeating the same repair next month.
Next, we will make sure the tear does not come back by covering the small habits that actually prevent damage in busy, pet-loving homes.
Prevent the Next Tear: Pet-Proof and Kid-Proof Habits That Actually Help
You have done the sofa cover repair, the waterproof repair tape is holding beautifully, and your living room feels calm again. Now comes the truly time-saving part: a few small habits that keep that same tear from coming back in the exact same spot next week.
Most repeat rips do not happen randomly. They usually start where fabric is pulled, pinched, or constantly flexed: the seat front edge when someone stands up, the armrest where pets perch, and seams where fabric tension is highest. Think of these as your sofa’s “stress points.” Protect those first and everything lasts longer.
A simple weekly checklist (5 minutes, tops)
-
Rotate and swap cushion positions once a week
- Why it works: Seat cushions do not wear evenly. The “favorite spot” gets more friction, more pressure, and more stretching, which weakens fibers and opens seams.
- What to do: Swap left and right cushions, rotate front to back (if the shape allows), and flip reversible cushions.
- Extra tip: If your tear was on the seat edge, rotate so that repaired edge is not always the front edge that takes the stand-up pull.
-
Trim pet nails and create a dedicated “pet blanket zone”
- Why it works: Claw contact on seams and edges is a top cause of new snags, especially when pets leap up and dig in to settle.
- What to do: Keep nails blunt, then place a washable blanket or throw on the pet’s preferred side or corner, ideally over the area that was repaired.
- Style-minded trick: Choose a soft, textured throw in a tone that complements your room, so the protection looks intentional, not like an afterthought.
- Bonus: This pairs perfectly with an anti-scratch couch cover if your pet is persistent and you want a more durable daily shield.
-
Wash covers gently and skip high heat
- Why it works: Hot water and high heat can stress elastane and synthetic blends, causing loss of stretch, thinning, and weakened seams. That makes any “how to fix a torn couch cover” solution harder because the surrounding fabric is already tired.
- What to do: Use a gentle cycle, mild detergent, and air dry or low heat when possible.
- Care cue: If you are unsure what your cover can handle, follow recognized textile care symbol guidance (see: Textile care symbols and safe washing guidance).
Protect the highest-stress spots first (targeted, not complicated)
If you only protect one area, make it the seat front edge. It is the place that gets pulled every time someone sits, shifts, or stands.
Use this quick priority list:
- Armrests (pet perches, kid climbing handles, snack resting spot)
- Seat front edge (constant pulling and friction)
- Cushion seams (tension lines where small frays become bigger splits)
Actionable options that actually help:
- Add a small overlay or targeted protector on the armrest and seat edge, especially if the tear was there. This reduces repeated flexing around your waterproof repair tape patch, which is key for long-term hold.
- If you notice new fuzzing or “bald spots” from claws, treat it as an early warning sign. Reinforce the area before it becomes another full tear.
Mini habit changes that prevent “re-tearing” after a tape repair
- Teach the “no launch” rule: Encourage kids to avoid bouncing into the same seat corner, which repeatedly yanks the cover at the edge.
- Lift, do not drag: When adjusting cushions, lift them instead of dragging across the cover. Dragging is sneaky friction that slowly weakens fibers.
- Give tape time: After any sofa cover repair with waterproof repair tape, avoid aggressive stretching, tight re-fitting, or a deep clean for the full cure window recommended on your tape packaging.
When prevention is telling you it is time for full coverage
If you are repeatedly repairing new spots or the fabric feels thin in multiple areas, your tape fix can still be a smart bridge, but you will likely be happier with a full-coverage solution that takes the daily beating for you. When your current cover is simply beyond repair, consider upgrading to a fresh, well-fitted set from our Sofa and Couch Covers collection for consistent protection and a clean, French-inspired finish.
Next, we will wrap everything up with a simple decision guide: when to keep repairing, when to reinforce, and when a full new cover is the most time-saving option for busy family life.

You’ve done the work, and now your sofa cover repair is holding strong. By assessing the damage, choosing the right waterproof repair tape, and applying it with care, you’ve learned exactly how to fix a torn couch cover in a way that’s both durable and discreet. You’ve also discovered simple habits to protect those high-stress zones so the same tear won’t return next week.
Your home deserves to feel calm, stylish, and ready for real life. Whether a quick tape fix is your bridge or your final solution, you now have the confidence to keep your furniture looking polished without the stress. Stop the tear before it spreads: reinforce the damaged spot today, then protect the whole sofa with a durable cover designed for real-life messes — browse FrenchCovers options that fit your home this week. Because a beautiful home isn’t about perfection; it’s about making every moment feel a little more chez vous.
FAQ: Quick Sofa Cover Repair Tips with Waterproof Repair Tape
Life happens: pets pounce, kids tumble, and a favorite sofa cover can tear at the worst moment. Below are fast, family-friendly answers drawn from our guide on sofa cover repair using waterproof repair tape, so you can learn how to fix a torn couch cover neatly, protect high-wear spots, and keep your living room looking effortlessly polished. Explore the full steps here: Torn Sofa Cover? Fix It Fast with Waterproof Repair Tape.
Q: Will waterproof repair tape damage my sofa cover fabric when I remove it?
A: In our sofa cover repair method, waterproof repair tape is meant to be a long-lasting patch, so removal can stress delicate weaves. If you may need to remove it later, test a small hidden area first and avoid pressing aggressively. See our prep guidance in Clean and prep before taping.
Q: Can I use repair tape on stretchy slipcovers without causing puckering?
A: Yes, but the article notes you should apply the waterproof repair tape while the cover is laying flat and relaxed, not stretched tight, to prevent ripples. Smooth outward as you press, and patch slightly beyond the tear for stability. Follow the technique in How to apply tape smoothly.
Q: How long does a tape repair last on a seat cushion area?
A: For high-friction seat zones, the post explains longevity depends on prep and overlap: clean, dry fabric and at least a small border past the tear helps the sofa cover repair hold. Expect shorter life on daily-use cushions, and consider pairing with an anti-scratch couch cover for ongoing protection. See High-wear areas and durability tips.
Q: Should I tape the outside or the inside of the cover for the best look?
A: For the most discreet finish, the article recommends applying waterproof repair tape on the inside whenever possible, so the exterior stays chic and smooth. Use an outside patch only if the tear gapes or the inside is inaccessible. Compare options in Inside vs outside patch placement.
Q: What can I do if the tear keeps spreading near a seam?
A: The guide advises stopping the spread first: patch past both ends of the rip, and reinforce along the seam line so the stress is distributed, not concentrated. If the seam is failing, combine waterproof repair tape inside with reduced tension by adjusting fit or adding an anti-scratch couch cover. See Seam tears and reinforcement steps.