One tiny snag on your sofa cover can make the whole room feel messy, even when you just cleaned. If you have kids, pets, or a busy schedule, you do not have time for sewing or shopping for a new cover. You need a quick fix that still looks good.
In this guide, you will learn how to repair sofa cover damage in about five minutes using a no sew fabric patch. We will show you how a simple sofa cover repair kit can help fix a snagged couch cover fast, stop fraying, and blend in with your style.
Next, let us look at why snags happen and how to choose the right patch for a clean, smooth finish.
Before You Patch: Identify the Damage (Snag, Pin Hole, Seam Split, or Tear)
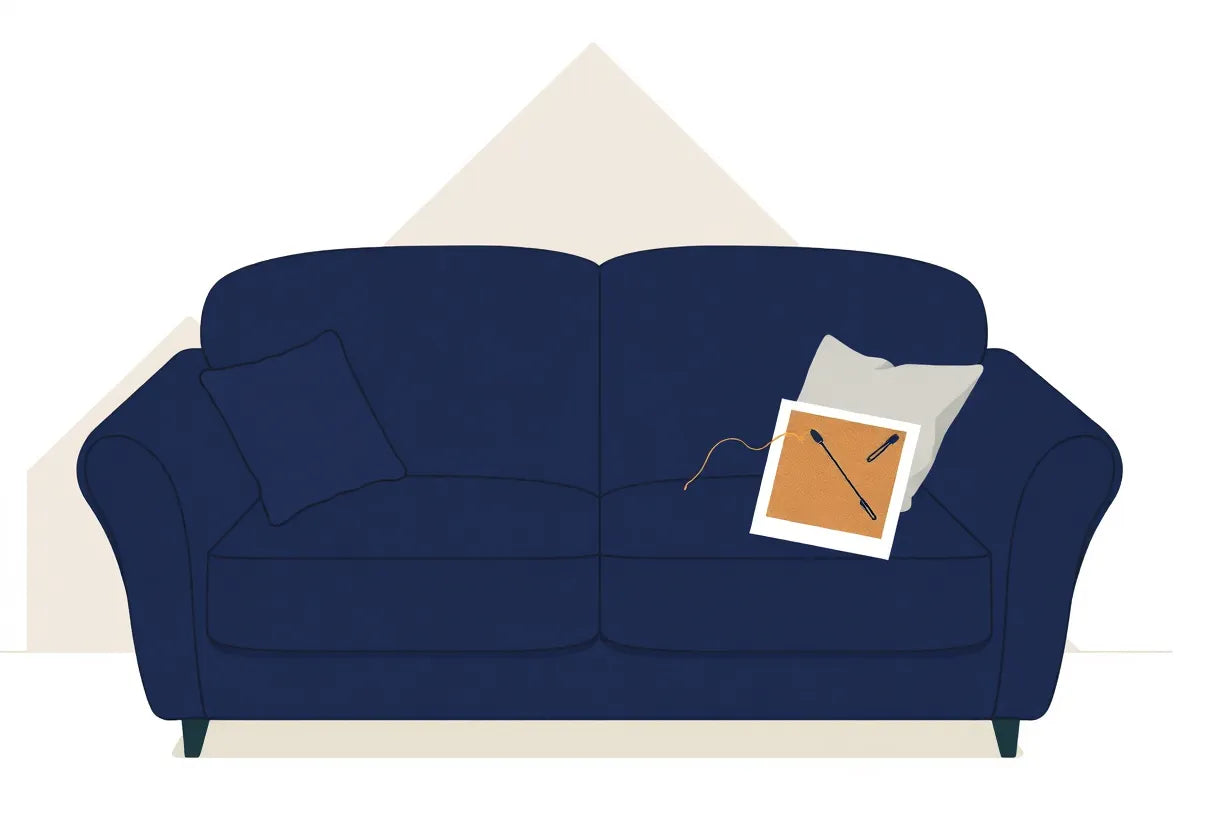
Before you reach for a no sew fabric patch (or open your sofa cover repair kit), take 60 seconds to name the damage. This quick check helps you repair sofa cover issues cleanly, so the fix holds up to real life: pets hopping up, kids flopping down, and everyone grabbing the same cozy spot.
60-second diagnostic checklist (do this first)
- Lay the cover flat on the sofa (or remove it and place it on a table if you can). Good light matters.
- Do not pull loose threads. Tugging can turn a tiny problem into a bigger hole.
-
Find the cause nearby so you can prevent the next snag:
- Pet claws catching on a looped weave
- Zippers on hoodies or throw blankets scraping the fabric
- Rough denim rivets along pockets snagging seat edges
- Velcro from kids’ shoes or backpacks grabbing threads
- Decide which category fits best below, then follow the matching “What to do” steps.
Snag (pulled thread)
What it looks like: A loop or pulled thread sitting on the surface, sometimes with a faint line leading to it. The fabric may not be broken yet, but the weave can be weakened.
What to do (fast and safe):
- Use a fine needle to gently catch the loop and pull it to the back side of the cover. This avoids enlarging the snag.
- If the area looks thinned or “open” afterward, reinforce it with a small no sew fabric patch on the inside (or the least visible side) to help prevent fraying.
This is the most common scenario when you need to fix a snagged couch cover quickly without turning it into a hole.
Small hole (about 1 to 5 mm)
What it looks like: A tiny puncture, often roundish, sometimes surrounded by slightly stressed threads. Common on armrests or the front seat edge where friction is constant.
What to do (best practice):
- Choose a patch that covers the hole with breathing room. Aim for at least 1 inch (2.5 cm) of patch beyond the hole in every direction.
- Keep the fabric relaxed and flat while patching. Stretching during application can cause puckering later and make the spot more visible.
Small holes are where a no-sew method shines because it reinforces fast without needing stitches.
Tear (up to a few inches)
What it looks like: A split with a clear start and end point. Edges may curl or fray, especially on woven covers.
What to do (stabilize first, then reinforce):
- Bring the edges close together naturally (do not force them).
- Use a larger patch than you think you need, and if the fabric feels weak, add a second layer on the inside for strength.
- If the tear is on a high-stress area (seat edge, armrest corner), prioritize durability over invisibility. A slightly larger, well-placed patch lasts longer than a tiny one that peels.
A patch can absolutely stabilize a tear, but the prep and patch size matter more here than with a pin hole.
Seam split
What it looks like: The fabric itself may be fine, but stitches have popped, often along cushion seams or where the cover is pulled tight.
What to do (temporary now, smarter long-term):
- A patch can serve as a short-term bridge to hold things together, especially if guests are coming and you need a quick tidy-up.
- Long-term, the best fix is reducing tension: consider a better-fitting protective cover that stays put and does not over-stretch at the seams.
If your home has pets and the same spots keep failing, upgrading to a tougher, tension-reducing cover can prevent repeat damage. For extra protection in claw-prone homes, see these anti-scratch couch cover options.
Now that you have identified the exact damage type, you are ready for the quick win: the 5-minute no-sew patch method that bonds cleanly, looks neat, and helps your living room feel pulled together again.

5-Minute No-Sew Patch Method (Step-by-Step)
If you already identified the damage (snag, tiny hole, or small tear), this is the fastest way to repair sofa cover fabric without pulling out a needle and thread. A simple sofa cover repair kit with a no sew fabric patch can make the spot look tidy again in the time it takes to refill a water glass.
Your 60-Second Tool Grab
Set yourself up first so you are not hunting for supplies with one hand while holding the cover flat with the other.
- No sew fabric patch (either iron-on or self-adhesive)
- Small sharp scissors
- Lint roller
- Mild cleaner (or a tiny drop of dish soap in water) and a clean cloth
- Optional: iron (low heat)
- Optional: pressing cloth (a thin cotton towel or pillowcase works well)
Tip for busy homes: Keep one patch sheet and mini scissors in a small drawer near the living room. The faster you fix snagged couch cover issues, the less likely the weave keeps loosening.
Your 5-Minute Timeline (Realistic and Beginner-Friendly)
- Prep: 2 minutes
- Cut + place: 1 minute
- Bond: 1 to 2 minutes
Step 1 (Prep in 2 Minutes): Clean, De-lint, Fully Dry
Patches fail most often because they are applied over lint, pet hair, or leftover cleaner.
- If possible, remove the cover and place it on a flat surface (table, counter, or even a clean floor).
- Lightly clean the area around the snag or hole. You want it free from skin oils and spills.
- Let it dry completely.
- Lint roll thoroughly in all directions, especially if you have pets. Even a few hairs can create tiny air gaps that weaken the bond.
If the damage is on a high-touch zone (armrest, front seat edge), spend the extra 20 seconds here. It pays off.
Step 2 (Cut and Place in 1 Minute): Round Corners, Match the Fabric Grain
This is the small detail that makes a patch look neat and stay put.
- Cut a patch that extends past the damage on all sides (think: enough coverage to stabilize the weave, not just cover the spot).
- Round all four corners. Sharp corners lift first in real life use.
- Align the patch with the fabric grain or knit direction so it blends and stretches naturally with the cover.
- Keep the cover flat and relaxed. Do not stretch it while placing the patch, or the repair can pucker when the fabric returns to normal.
Quick check: Smooth the cover with your palm before bonding so the patch sits on a wrinkle-free surface.
Step 3 (Bond in 1 to 2 Minutes): Press, Do Not Slide
Choose the instructions that match your patch type.
If you are using an iron-on no sew fabric patch
- Set the iron to low to medium heat (no steam unless the patch brand specifically says otherwise).
- Place a pressing cloth over the patch.
- Press straight down firmly for the time recommended on the package. Do not slide the iron around, since that can shift the patch and distort the fabric.
- Lift the iron, move, press again if needed to cover the full patch.
Safety note (especially for synthetic covers): Always follow the patch brand’s heat settings to avoid melting polyester, acrylic, or spandex blends. When in doubt, start cooler and press a bit longer rather than turning the heat up.
If you are using a self-adhesive patch
- Peel and place carefully (you typically get one clean shot).
- Press firmly with your palm for 30 to 60 seconds, focusing on the edges and corners.
- For extra hold, press with a clean cloth and a flat object (like a book) for another 30 seconds.
Step 4 (Finish): Let It Set, Then Test Gently
This final minute is what keeps your repair sofa cover job from peeling the next day.
- Let the patch cool (iron-on) or set (adhesive) before moving the fabric.
- Gently rub the area with your fingertips and check the edges. If an edge lifts, re-press (iron-on) or apply firm pressure again (adhesive).
- Trim any loose threads around the patch with scissors. Do not pull threads, even if they are tempting. Pulling can reopen the snag path and make the hole larger.
Design-aware tip: If the patch is in a visible spot, take 10 seconds to smooth the nap or texture in one direction so the repaired area catches light the same way as the surrounding fabric.
Want This to Be Even Easier Next Time?
Covers that remove quickly and wash well make repairs and everyday upkeep much simpler, especially in homes with kids and pets. If you are ready for a cover that is built for real life (and guest-ready fast), browse these washable sofa and couch covers: https://frenchcovers.com/collections/sofa-couch-covers
Next up, we will make your patch blend in beautifully with color, texture, and placement tricks so the fix looks nearly invisible, not like a quick emergency save.
Make the Fix Nearly Invisible (Color, Texture, and Placement Tricks)
You already know how to repair sofa cover damage fast with a no sew fabric patch. Now comes the part that makes your living room feel polished again: blending the patch so it looks intentional, not like a quick save. With a few design-aware tricks, your sofa cover repair kit can help you fix a snagged couch cover in a way that holds up to real life and looks good in photos, too.
1) Color match that actually blends (the one-shade rule)
If you are choosing between two close colors, go one shade darker on most woven covers. Darker patches tend to “sink in” visually because shadows in textured fabric naturally read darker, especially around high-wear areas like armrests and seat edges.
Actionable steps:
- Test under daylight, not just warm indoor lamps. Morning window light shows undertones and makes a near-match obvious.
- If your cover has a heathered or flecked look, pick a patch that matches the dominant mid-tone (not the lightest thread).
- For patterned covers, match the background color first, then place the patch where the pattern change is less noticeable (near seams, edges, or piping).
Quick real-life examples:
- Armrest snag from cat: A slightly darker patch often disappears into the arm’s natural shadow.
- Seat-edge tear from getting up: Darker tones hide scuffing and future wear better than a lighter patch.
- Backrest pull from zipper: Daylight testing matters most here because this zone is eye-level and catches direct light.
2) Texture match: knit vs. woven (so it moves like the cover)
A patch can be the right color and still look “off” if the texture does not behave the same way as the cover fabric.
Use this simple rule:
- Knit patch for stretchy covers (jersey-like, spandex blends, stretchy slipcovers). Knit patches flex with the fabric, so the repaired spot does not pucker when someone sits down.
- Woven patch for tight weaves (canvas, twill, thicker cotton, linen blends). Woven patches sit flatter and look cleaner on structured fabrics.
Practical tip: before sticking anything down, lightly stretch the cover in your hands. If it springs back easily, treat it like a knit and choose a patch that can flex with it.
3) Placement tricks: hide it in plain sight
Where you place the patch can matter as much as which patch you choose, especially when you are trying to repair sofa cover damage in a visible spot.
Best placement options (from most hidden to most visible):
- Inside or back side of the cover (when the fabric is only weakened, not open). If you can stabilize from behind, the front stays clean.
- Along a seam line or near piping. The eye expects a line break there, so your patch edge is less noticeable.
- On an edge that already has wear (seat front edge, armrest corner). A patch blends with normal texture variation.
Micro-alignment trick: if your cover has a visible weave, rotate the patch so its grain runs the same direction as the fabric. Even a great color match can stand out if the patch weave is tilted.
If your patch must go on a very visible zone, make it look deliberate:
- Place it symmetrically, not randomly.
- Keep the patch shape neat and consistent (rounded corners look cleaner and reduce peeling).
4) Design-friendly upgrade: turn one patch into a “detail”
If you are patching a prominent spot, consider making it a coordinated accent rather than a cover-up.
A simple approach that looks elevated:
- Patch the damaged armrest, then add a matching patch on the other armrest at the same height for balance. It reads like a tailored design choice, especially on solid-color covers.
- For seat-edge tears, use two small matching patches near the left and right seat edge, keeping spacing consistent.
This is especially handy for pet homes where the same areas get repeated wear. You are not just fixing, you are adding a little structure to the room’s look.
Do / Don’t (save this for the next repair)
Do
- Do test your patch color in daylight before committing.
- Do match texture and stretch (knit with knit, woven with woven).
- Do align patches with seams or piping when the spot is visible.
- Do consider paired patches for a clean, symmetrical finish.
Don’t
- Don’t choose the lightest close color “because it matches in the package.”
- Don’t place a stiff woven patch on a very stretchy cover (it can ripple when you sit).
- Don’t patch while the cover is slightly damp or linty, bond strength drops fast.
- Don’t put a patch right in the middle of the seat top if you can shift it closer to an edge or seam line.
One more way to keep repairs looking good in high-wear zones
If your family’s damage hotspots are predictable (armrest corners, cushion fronts, chaise edges), it can be smarter to protect those zones separately so your main cover stays pristine longer. Targeted protection is also easier to wash and replace as needed.
Internal link: Target high-wear zones with separate covers
Next up, we will make sure you do not have to keep patching every week with quick kid and pet-proof habits that take seconds but prevent new pulls before they start.

Prevent New Snags (Kid- and Pet-Proof Habits That Take Seconds)
You already know how fast a no sew fabric patch can repair sofa cover damage. The next win is making sure you do not have to keep reaching for your sofa cover repair kit every weekend.
Think of snag prevention as a tiny set of routines that protect the high-wear zones where pulls start most often: the front seat edge (where jeans rivets and knees rub), the armrest corners (where pets perch and kids climb), and the chaise edge (where feet drag when lounging). If you can keep those areas calmer, your cover stays smoother, longer.
1) Pet routine (30 seconds a day, 5 minutes a week)
- Trim nails on a schedule that fits your home. Shorter, smoother nails mean fewer accidental catches when your cat launches off the armrest or your dog “digs” before lying down. If you are not sure you are trimming safely, ask your groomer or vet to show you once, then maintain at home.
- Place a scratch post or pad close to the sofa, not across the room. Pets usually scratch where they already spend time. Put an approved scratching option within a few steps of their favorite sofa corner so the habit is easy to choose.
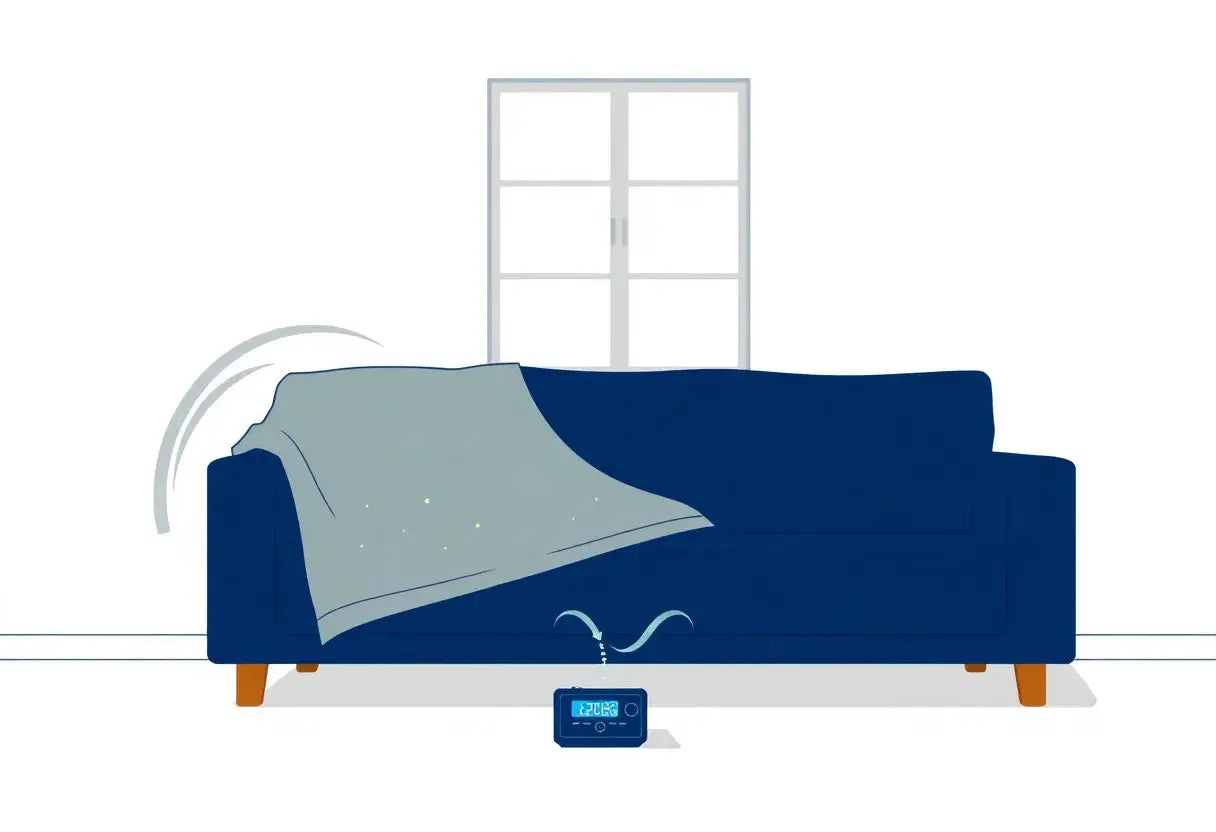
- Add a washable throw on the favorite spot. If your pet always curls up on the same cushion or arm, a throw takes the daily friction and claw taps so the cover does not have to. Bonus: you can wash the throw more often than the full cover.
Actionable tip: If you notice you keep needing to fix snagged couch cover damage on the same armrest corner, treat it like a “pet hotspot” and protect it first with a throw or a small removable layer.
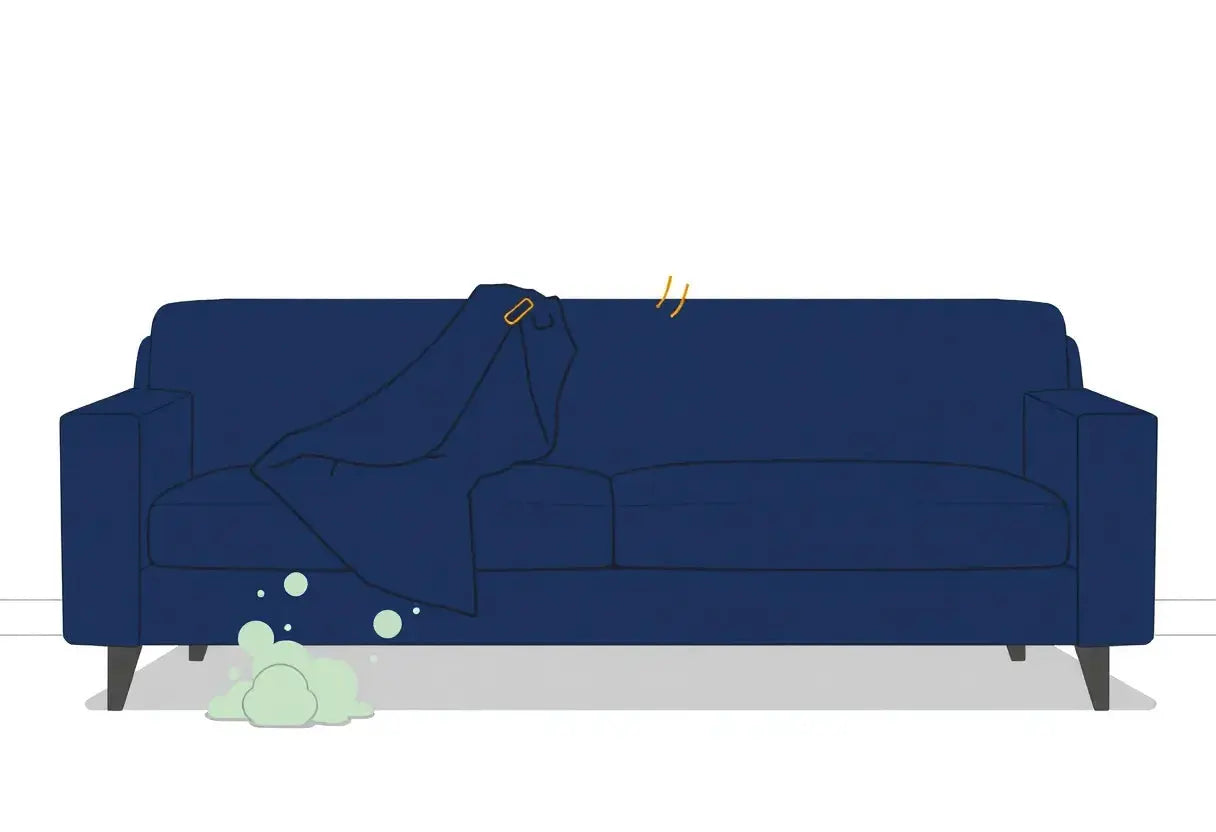
2) Laundry routine (2 minutes now, fewer snags later)
A lot of new pulls happen in the wash, especially with mixed loads and high heat. Protect the fibers so your next quick repair stays a one-time thing.
- Wash covers inside out. This reduces abrasion on the outer face where snags are most visible.
- Skip high heat. High heat can stress and weaken many upholstery cover fabrics, making them more catch-prone and more likely to pucker around an old patch. Use the gentlest heat setting the care label allows.
- Avoid overloading the machine. Overloaded loads twist and grind fabric against zippers, buttons, and each other. That extra tension is a common reason a “small pull” turns into a bigger run.
If you want a simple refresher on safe settings, check fabric care label symbols and ironing temperatures: https://www.clevercare.info/
3) Living room routine (10 second reset before you sit)
These are the quick “save yourself later” habits that prevent the most annoying snags.
- Keep Velcro away from the seating surface. Velcro from kids’ shoes, sports gear, and some wraps is practically designed to grab threads. If Velcro lands on the sofa, close it immediately.
- Watch sharp toys and hard edges. Small plastic parts, pointed corners, and even building blocks can catch when someone kneels or slides across the cushion.
- Be careful with zipper blankets and hoodies. Zippers love armrest corners and seat edges. If a blanket has a zipper, rotate it so the zipper is not rubbing against the cover.
Family-friendly rule: If it can scratch a phone screen, it can snag a cover.
4) Material matters (prevention starts with the right cover behavior)
If you are choosing a cover or thinking about upgrading later, the fabric and fit do a lot of preventative work for you.
- Thicker, tighter weaves snag less. They are simply harder for claws, Velcro, and rough denim to hook into.
- A fitted cover reduces friction and seam stress. Loose fabric shifts and rubs, which can create tension at seams and edges. A more secure fit means less movement, fewer pulls, and fewer emergency moments where you need to repair sofa cover damage again.
Practical style note: A smoother, tighter fabric also tends to look more polished day to day, which is exactly what busy homes want when the living room is doing double duty.
5) The 2-minute monthly inspection (catch tiny pulls before they spread)
Once a month, do a quick scan in natural daylight. You are not looking for perfection, just early warning signs.
Checklist:
- Front seat edge: feel for roughness or tiny loops
- Armrest corners: look for fuzzing, pulled threads, or thinning
- Chaise edge (if you have one): check where feet drag on and off
- Seams and piping lines: look for strain or small separations
If you find a fresh micro-snag, handle it right away and reinforce if needed. A small, early fix with a no sew fabric patch looks cleaner and holds better than waiting until the weave opens up.
Next up, let’s be honest about the moments when patching is not the best long-term answer, and how to tell when it is smarter to replace the cover instead of fighting repeated snags.
When a Patch Isn’t Enough: Know When to Replace the Cover (Not the Sofa)
A no sew fabric patch is perfect for those quick, confidence-boosting saves, especially when you need to repair sofa cover damage fast and keep the room feeling pulled together. But if you are patching the same spots over and over, the real fix is often simpler than you think: replace the cover, not the sofa.
Here is a practical decision guide to help you choose the option that keeps your living room looking calm, clean, and guest-ready.
Replace the cover if you notice these red flags
Think of this as your “the fabric is tired” checklist. If two or more are true, a fresh cover is usually the smarter, longer-lasting answer than another sofa cover repair kit application.
-
Repeated snags in multiple zones
If you keep needing to fix snagged couch cover damage on the armrest, seat edge, and backrest, the weave is likely catching too easily across the whole surface. Patches help, but they cannot change the overall snag-prone texture. -
Fabric thinning or “shiny” wear spots
High-friction areas (front seat edge, armrest corners, chaise edge) can get thin even if there is no hole yet. A patch sticks best to stable fabric. When the base fabric is thinning, new snags and tears tend to return quickly. -
Stretched-out fit that will not stay smooth
If the cover sags, twists, or creeps after you straighten it, it creates extra tension and rubbing in the same places. That friction invites more pulls and makes each new repair stand out more. -
Seams failing often
One seam split can be a fluke. Frequent seam issues usually mean the cover is under constant stress (tight in some areas, loose in others). Patching a seam can be a short-term bandage, but you will feel the difference immediately with a better-fitting replacement.
Practical scenario: rental move-out prep
If you are patching several spots just to look “presentable,” replacing the cover can be the fastest way to get an even, uniform look without chasing multiple little repairs.
Patch is still great for these situations
Your repair sofa cover routine can absolutely stay simple if the damage is limited and the fabric around it is strong.
- One-off damage like a single pulled thread or isolated snag
- Small holes and tiny worn spots (especially in low-tension areas)
-
A quick cosmetic save before guests arrive
Example: holiday guests in 24 hours. A well-matched no sew fabric patch can smooth the visual distraction fast, then you can decide later if you want a longer-term upgrade.
If the cover is generally in good shape, your patch method from earlier sections is still the most time-friendly option.
The cost-smart reality: a new cover can refresh the room faster than “fixing” the old one
When covers get tired, people often try deep cleaning, shaving pills, spot treating, and repeated patching. That can help, but it takes time and the results are not always consistent.
A fresh protective cover often gives you the biggest visual reset per minute because it:
- Restores a crisp fit and cleaner lines, which makes the whole sofa look newer
- Eliminates the patchwork look when there are multiple repairs in different spots
- Adds protection immediately, so you are not repairing the same damage again next week
Practical scenario: new puppy phase
During high-chaos seasons, it is usually easier to protect first (washable, secure, designed for wear) and save detailed repairs for later.
Choose a replacement cover that matches real life (pets, kids, and style)
If you are ready to replace the cover, focus on four features that make everyday living easier:
- Pet-friendly textures: tighter weaves and more structured fabrics tend to snag less than looser knits
- Washable fabrics: because spills and pet hair happen on busy weeks
- Secure fits that stay put: less shifting equals less friction, less tension on seams, and fewer snag hotspots
- Design that complements your room: choose a tone and texture that looks intentional, not purely “protective”
If pets are a big part of the wear-and-tear story in your home, you can explore pet-focused protection options here:
Pet-focused protection options
Quick decision shortcut (if you only have 10 seconds)
- One snag or small hole on solid fabric: use your sofa cover repair kit and move on
- Multiple snags, thinning, poor fit, or recurring seam issues: replace the cover and protect the sofa long-term
Next, we will wrap up with a simple path forward so you can choose between patching and upgrading based on your schedule, your household, and how “guest-ready” you want your living room to feel this week.

So, you’ve mastered the quick, five-minute fix with a no sew fabric patch to repair sofa cover snags and tears. This simple method from a sofa cover repair kit is perfect for those one-off accidents, letting you fix a snagged couch cover neatly and get back to your day. Remember, the real win is pairing these smart repairs with easy prevention habits and knowing when a fresh start is the most elegant, practical choice for your busy, beautiful home.
Need a longer-lasting fix than patching? Upgrade your protection today with an anti-scratch, washable couch cover—so your living room stays guest-ready all week.
Because a calm, collected home isn't about perfection; it's about smart solutions that let you enjoy the moments that matter.
Quick Patch FAQs for Busy Homes
Life happens fast in a family living room, especially with pets. Below are quick, design-friendly answers pulled straight from our 5 minute anti snag method so you can use a no sew fabric patch to repair sofa cover damage neatly, confidently, and without turning a tiny snag into a bigger problem.
Q: Will a no-sew patch hold up if I have cats or dogs? A: Yes, the article’s 5 minute method is designed for real life wear and tear, including pet claws. A quality sofa cover repair kit plus good prep and firm pressure helps a no sew fabric patch stay put while you repair sofa cover damage quickly. See Pet proof anti snag tips and How to apply the patch in 5 minutes.
Q: Can I use an iron-on patch on stretchy polyester or spandex sofa covers? A: The article recommends avoiding heat on stretchy covers because it can warp fibers and make the repair look puckered. Instead, use a flexible no sew fabric patch from a sofa cover repair kit to repair sofa cover fabric while keeping the smooth, tailored look. See Best patch type for stretch fabrics and Material check.
Q: How do I fix a snag without making the hole bigger? A: Follow the anti snag guidance in the post: do not pull the thread, gently flatten it back into place, then secure the area with a no sew fabric patch. This is the safest way to fix snagged couch cover spots and still repair sofa cover damage cleanly. See Anti snag steps and Before you patch.
Q: What size patch should I use for a small tear on a seat cushion cover? A: The article suggests choosing a patch that extends beyond the tear so the adhesive grips healthy fabric, not just the split. For most small tears, cut a rounded patch with extra coverage so your no sew fabric patch blends in and your repair sofa cover fix lasts. See Choosing patch size and Cutting tips for a clean edge.
Q: How do I wash a sofa cover after I’ve patched it? A: Let the patch set fully first, then wash gently as advised in the care section to protect the bond and keep the finish looking polished. Using the right cycle helps your sofa cover repair kit result stay smooth, especially after you fix snagged couch cover areas. See Aftercare and washing and How long to wait before washing.