One small snag can make a beautiful couch look worn out overnight, especially with kids, cats, or a busy living room. If you have been putting off a fix because you think it will be messy, expensive, or obvious, you are not alone.
In this post, you will learn how to repair torn couch cover fast, using a waterproof fabric patch that blends in and holds up to real life. We will show a simple 10 minute method that helps with pet-proof couch protection and adds an extra layer of anti-scratch couch cover defense, without changing your style.
Let’s start with what causes most tears and how to prep your couch cover for a clean, long-lasting patch.
Before You Patch: Identify the Tear and Choose the Right Fix
Before you repair torn couch cover damage, take two minutes to diagnose what you are actually dealing with. This quick check helps you pick the right waterproof fabric patch (and avoids the frustrating moment when a patch lifts, wrinkles, or shows through after the first sit).
Quick diagnostic checklist (2 minutes, no tools needed)
1) Where is the tear located?
Different locations fail for different reasons, so they need different approaches.
-
Seam split (along a stitched line):
This usually looks like the stitches gave up, not the fabric itself. Common on fitted slipcovers that are pulled tight. If the cover feels strained when you put it on, the seam will keep trying to open. A patch can stabilize it, but you may also need to reduce stress on that area (more on that in the pet-proofing section later). -
Flat panel tear (middle of a cushion or back panel):
Often caused by a snag, toy, zipper, or a single claw catch. These are usually the easiest to patch cleanly because the surface is flatter and gets less edge friction. -
High-stress edge (armrest front, seat edge, cushion piping):
These spots spread faster because they flex constantly and rub against clothing, paws, and the edge of the cushion. If you want long-term pet-proof couch protection, treat edge tears as high priority and give them extra patch overlap. Also consider adding dedicated protection on arms and cushions after you patch.
Internal link: Protect the highest-wear areas (arms & cushions) https://frenchcovers.com/collections/armrest-cushion-covers
Practical examples:
- A seam split often opens into a straight line that follows the stitching.
- Claw punctures tend to appear as tiny holes or short jagged snags that can quickly turn into a longer rip when pulled.
2) What fabric are you patching?
Your patch should behave like your cover, not fight it.
-
Stretch knit (often soft, jersey-like, or spandex blends):
Choose a patch that stays flexible. A stiff patch on a stretchy cover can ripple or peel at the edges when someone sits down. -
Woven fabric (canvas-like, linen look, twill, many “performance” weaves):
These usually patch very well because the surface is stable. Focus on matching texture so the repair blends in. -
Smooth vs. textured:
A shiny patch on a matte cover (or vice versa) is what makes repairs look obvious. If your cover has visible texture, look for a patch with a similar finish.
Action step: Check the care label on your couch cover before you commit to any adhesive patch. If it warns against heat, solvents, or certain washing methods, follow that guidance so your repair stays neat after cleaning. When in doubt, also follow the manufacturer instructions included with your patch kit, especially for cure time and washing.
3) Is this a “today fix” or a “daily-life fix”?
Be honest about your timeline. It changes your best move.
-
Temporary fix (guests today):
Prioritize speed and appearance. A well-trimmed, well-placed waterproof fabric patch can look surprisingly clean right away, but you still need a fully dry surface to stick properly. -
Longer-lasting fix (kids, pets, everyday use):
Prioritize strength and coverage. Plan on a larger patch with rounded corners and enough overlap to handle flexing. This is especially important if you want the repair to support an anti-scratch couch cover strategy long term, where the cover stays presentable even with daily claw traffic.
4) Avoid these common patching mistakes (they cause most failures)
If patches “never work” in your house, it is usually one of these:
-
Patching over lint, pet hair, or body oils: Adhesive sticks to the debris, not the fabric. Result: peeling edges.
Quick fix: run a lint roller first, then clean. -
Patching a damp cover: Moisture blocks adhesion. Result: bubbling and early lift.
Quick fix: let it air dry fully before applying any waterproof fabric patch. -
Cutting the patch too small: Small patches concentrate stress right at the tear line. Result: the rip keeps spreading.
Quick fix: plan for generous overlap (you will do the exact sizing in the next section). -
Ignoring high-stress zones: Armrests and seat edges take constant friction. Result: a patch that looks fine today but lifts next week.
Quick fix: use extra overlap and consider adding targeted arm and cushion protection after the repair for better pet-proof couch protection.
Once you have identified the tear type and fabric, you are ready for the fast part. Next up: the 10-minute, no-sew method to repair torn couch cover damage step by step using a waterproof fabric patch that stays put and looks clean.

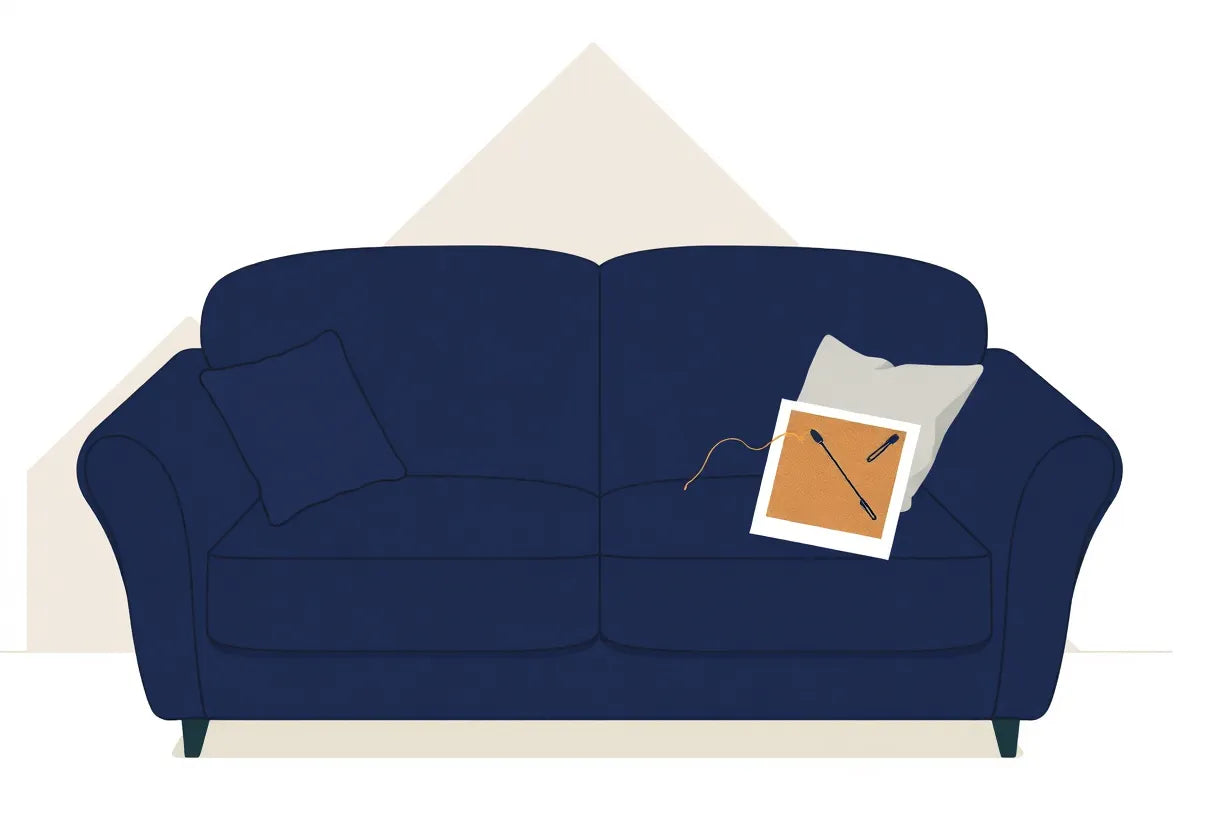
10-Minute Step-by-Step: Waterproof Patch Repair (No Sewing)
You have already identified the tear and chosen a patch that suits your fabric. Now it is time to repair torn couch cover quickly and neatly, using a waterproof fabric patch that can handle real family life, from snack spills to pet pileups.
Set a timer if it helps. This is designed to be fast, but the key to a long-lasting hold is doing each minute well, especially cleaning and drying.
Minute 1: Remove the cover and set up a smooth workspace
- If your couch cover comes off, remove it and lay it on a flat, hard surface (a table, counter, or clean floor).
- Pick strong lighting so you can see frayed threads and the exact tear line.
- Slide a cutting board or a piece of cardboard under the damaged area if you need a firmer backing for trimming and pressing.
If the cover cannot be removed, you can still patch in place, but take a moment to smooth the fabric tight so the tear is not stretched open.
Minutes 2 to 3: Clean, then dry fully (this is where most patch jobs succeed or fail)
A waterproof fabric patch needs clean fibers to grip. Oils, crumbs, and pet hair can weaken adhesion and cause lifting later.
- Clean the area gently with mild soap and water using a soft cloth.
- Wipe again with clean water to remove soap residue.
- Dry completely. Pat with a towel, then air-dry for a few minutes if needed.
- Remove lint and pet hair thoroughly (lint roller or tape works well), especially around the tear edges.
Tip for pet homes: if you are aiming for pet-proof couch protection, treat hair removal like a serious step. Even small hairs under the patch can create tiny channels that invite peeling over time.
Minutes 4 to 5: Trim loose threads and align the tear edges (do not overlap)
- Snip away frayed fibers and long loose threads so they do not poke out from under the patch.
- Bring the torn edges together so they meet cleanly.
- Do not overlap the fabric edges. Overlapping creates a ridge that shows through and can stress the adhesive when someone sits down.
If the tear is on a stretchier knit, align it in its relaxed state, not stretched. This helps the patched area flex more naturally later.
Minutes 6 to 7: Cut the patch with rounded corners and the right overlap
Patch size matters, especially on high-friction zones like seats and armrests.
- Cut a patch with rounded corners (think quarter-circle corners instead of sharp points).
- Make it at least 1 inch (2.5 cm) larger than the tear on all sides.
Why rounded and larger?
- Best-practice guidance shows rounded corners lift less than sharp corners.
- A bigger overlap improves hold where people slide, sit, and pull on the cover, like the seat and arm areas.
If your goal is an anti-scratch couch cover effect, that extra overlap is your friend. It helps the patch resist edge lifting from claws and repeated rubbing.
Minutes 8 to 9: Apply the patch with firm pressure from center outward
- Position the patch carefully before sticking it down. Once it touches, you want minimal repositioning.
- Apply it starting at the center, then press outward in all directions to push out trapped air.
- Use firm, even pressure along the edges, where lifting typically begins.
If you have a small roller (even a clean kitchen rolling pin), gentle rolling can improve contact. Otherwise, the heel of your hand works well. The goal is tight, full contact without bubbles.
Minute 10: Test, then let it cure before heavy use or washing
- Gently flex the fabric around the patch to confirm it moves with the cover.
- Check the edges for any early lifting and press again if needed.
- Let the patch cure exactly as directed on your patch packaging before you wash the cover, let pets dig in, or return it to full daily use.
Important reminder: cure time is product-specific. Following the instructions on your patch kit is what turns a quick fix into a durable one.
If the tear was caused by a spill or you want extra backup protection in a busy home, consider adding a water-resistant layer over the whole couch after the repair: If spills caused the damage, consider an extra layer of protection | https://frenchcovers.com/collections/waterproof-sofa-covers
Next, we will make sure your repair looks intentional and stylish, so the patch blends in instead of announcing itself.
Make It Look Good: Blend the Patch So It Doesn’t Scream “Repair”
You already know how to repair torn couch cover fast with a waterproof fabric patch. Now let’s make that fix look like it belongs there, so your living room still feels pulled-together, not “patched in a hurry before company arrives.”
Color-match (or go intentional) for a design-forward finish
Option A: Disappear the patch (best for classic, cozy rooms).
- Choose the closest shade to your cover in both color and depth (warm beige vs cool beige matters).
- If your fabric has multiple tones (heathered gray, speckled oatmeal), pick a patch that matches the dominant mid-tone rather than the lightest thread. That reduces the “sticker” effect.
Practical example: In minimalist, neutral spaces, a neutral-on-neutral patch often blends best because there is less visual noise competing with the repair.
Option B: Make it look like a detail (best for modern, playful homes).
- A neat, clean-edged contrasting patch can read like intentional design, especially on solid-color covers.
- Keep the shape simple (rounded rectangle or square) and align it neatly (more on placement below).
- Repeat the patch color somewhere else in the room (a cushion, throw, or wall art) so it feels coordinated.
Practical example: A charcoal patch on a light gray couch can look modern when echoed by a charcoal pillow or a black floor lamp.
Place with purpose: hide the “repair” in plain sight
A patch looks more natural when it follows the couch’s existing geometry. One simple rule helps a lot:
-
Align patch edges parallel to existing seams or panel lines whenever possible.
Even if the tear is irregular, your patch edges can look tidy and intentional when they mimic the cover’s construction lines. The visual system reads “designed” instead of “fixed.”
Where this works especially well:
- Along the side panel where there is a vertical seam
- On seat cushions where there is an existing horizontal edge or piping line
- Near an armrest where seams already create strong boundaries
If your tear is in a high-friction spot (seat front edge or armrest top), keep your overlap generous (as you did in the repair steps) and focus on straight, confident alignment so the repair looks tailored, not temporary.
Texture tricks: reduce shine and contrast
Texture mismatch is what often makes a waterproof patch stand out, even when the color is close. Use these quick checks before you commit:
- Match the finish: If your cover is matte and woven, a glossy patch will catch light and announce itself. Aim for a similar level of sheen.
- Match the “hand” visually: Chunky weaves, microfiber, and brushed textures all reflect light differently. Choosing a patch with a similar surface look helps the repair blend from a normal viewing distance.
If your cover has a noticeable texture and your patch options are limited, placing the patch closer to a seam or panel line helps because the eye expects slight changes there.
Quick cover-up options while the patch cures
Even a well-matched patch can look more noticeable in the first hours, especially if the adhesive is still settling. While your waterproof fabric patch cures according to the packaging directions:
- Add a throw over the area (great for family movie nights and snack time).
- Shift attention with a cushion placed casually near the repair, especially if the tear was on a back cushion or inner seat area.
- Re-style the zone for a day: A small side table or basket nearby can help draw the eye away while everything sets.
These are also smart habits for pet-proof couch protection: throws act as a washable, replaceable buffer in the highest-wear zones.
If pets caused the tear, pair the repair with daily protection
A patch is a great save, but claws and daily scrambling can test any repair. For homes with cats, dogs, or both, consider adding an anti-scratch couch cover as your everyday layer so the patched spot is not taking the full impact again. You can browse tougher daily options here:
For pet homes, pair repairs with tougher daily protection: https://frenchcovers.com/collections/anti-scratch-couch-covers
Next up, we’ll lock in the win with a simple, family-friendly plan to prevent the next rip and keep your couch looking fresh long after you repair torn couch cover.

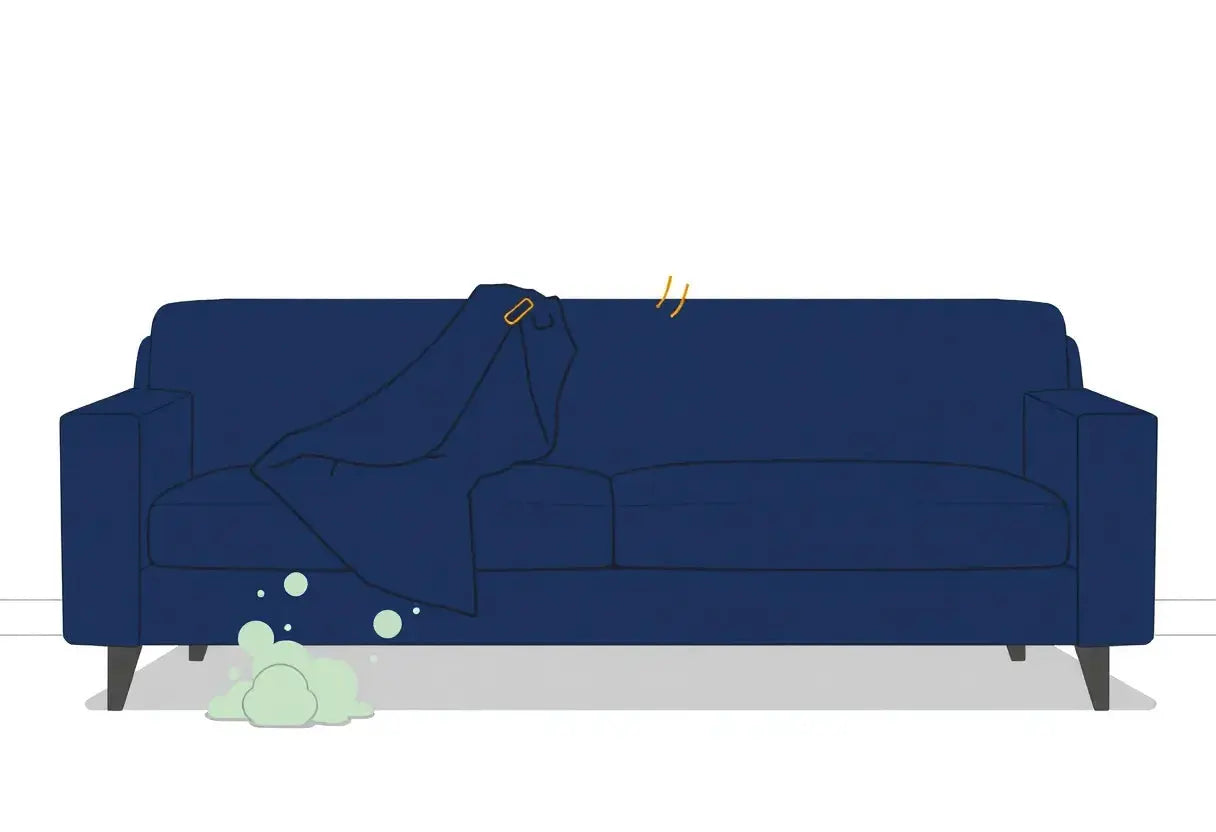
Pet-Proofing After the Fix: Stop the Next Rip Before It Starts
You have already taken the smart step to repair torn couch cover damage with a waterproof fabric patch. Now let’s make sure that patch is not just a quick win, but the start of a calmer, cleaner, longer-lasting living room, even with paws, playtime, and movie nights in the mix.
Think of this as your simple, family-friendly prevention checklist. It is designed to support pet-proof couch protection without turning your home into a “no one touch anything” zone.
1) Nail care that actually protects fabric (and your patch edges)
If claws are what caused the tear in the first place, your best next step is consistent nail maintenance.
- Trim and lightly file nails on a regular schedule (many pet owners find weekly checks and trims every 2 to 4 weeks helpful, depending on the pet).
- For cats, place a scratch post or scratch pad right next to their favorite couch corner. Convenience matters. If the post is across the room, the couch still wins.
- If your pet targets one specific spot, place the scratch option there first, then slowly move it to your preferred location over time.
Why it works: claw tips snag fibers, and once a snag starts, high-friction movement (jumping up, turning, “making biscuits”) can spread it. Keeping nails smoother is one of the simplest ways to extend the life of both your cover and your waterproof fabric patch.
For behavior-focused scratching guidance, the ASPCA is a reliable reference: https://www.aspca.org/
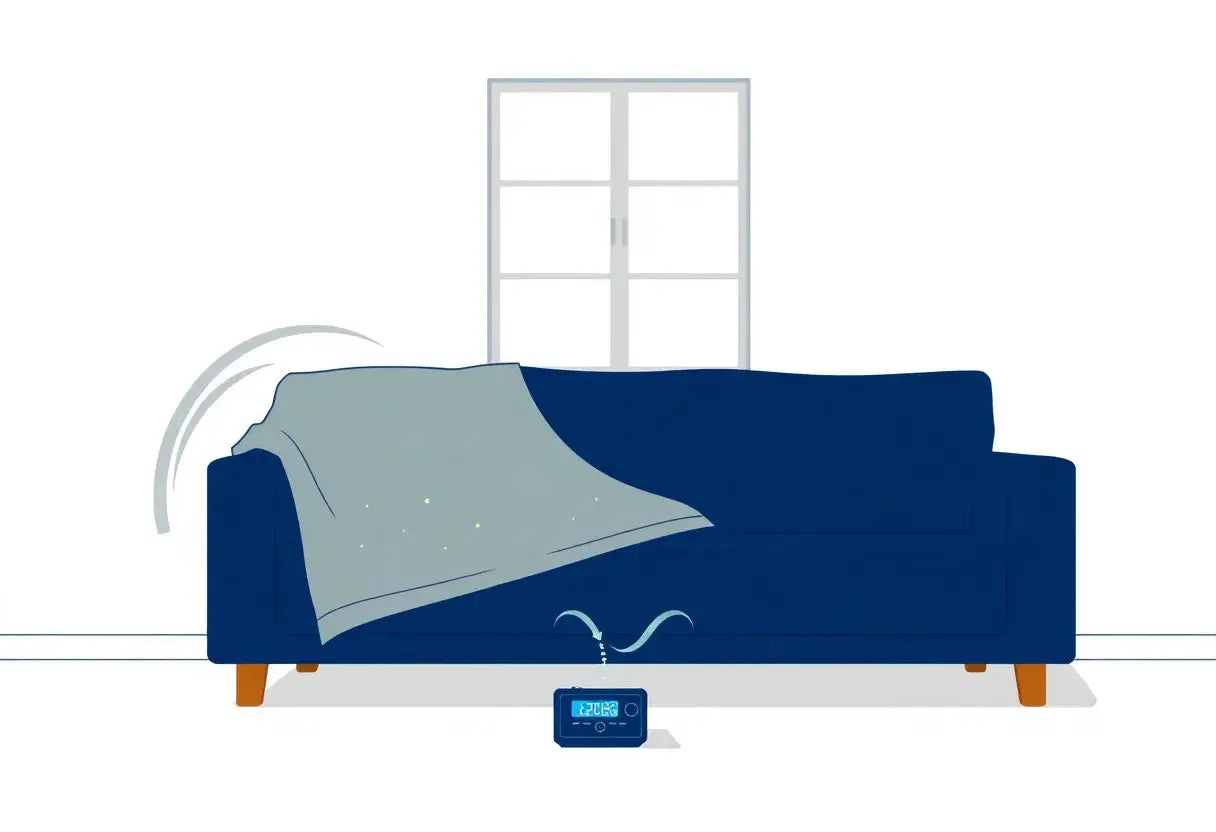
2) Add a washable “sacrificial layer” in the highest-friction zones
Even the best patch holds up longer when it is not taking constant abrasion. Most households see faster wear where people and pets naturally press, pivot, and pull fabric:
- Armrests and front seat edges (common launch and landing zones)
- The center seat cushion area (constant sitting and shifting)
- The spot near the seam where hands grip to stand up
Try this:
- Drape a washable throw over the seat middle and armrests during the day.
- Choose a throw with enough weight to stay put (or use simple grip pads underneath).
- Wash the throw more often than the cover, so you reduce deep-cleaning stress on the cover itself.
If your couch arms are the problem area, it can help to add targeted protection there. This pairs beautifully with an anti-scratch couch cover strategy in pet homes:
Anti-scratch options: https://frenchcovers.com/collections/anti-scratch-couch-covers
Arm and cushion protection (high-wear zones): https://frenchcovers.com/collections/armrest-cushion-covers
3) Create a “pet zone” so the couch is not the default nap spot
This is the most design-friendly trick on the list because it reduces wear without looking like a barricade.
- Place a pet bed or folded blanket near the couch, not hidden in another room.
- If your pet seeks warmth, place the bed where the family naturally gathers (near the couch corner, coffee table, or window light).
- Reward the pet for choosing the pet zone, especially right after you repaired the torn couch cover. Those first few days help set the new routine.
If you want more enrichment basics to support better furniture habits, the Humane Society is a solid general resource: https://www.humanesociety.org/
4) Wash smart so fibers stay resilient (and future tears are less likely)
A patch is only as strong as the fabric around it. One overlooked cause of repeat tearing is over-aggressive laundering, especially high heat.
- Follow your cover’s care label closely: water temperature, cycle type, and drying instructions.
- Avoid repeated high-heat drying. Textile care guidance generally warns that high heat can weaken fibers over time, reducing resilience and making fabric more likely to split at stress points (like armrests and seat edges).
- If you can, air dry or use low heat, then re-fit the cover while it is still slightly relaxed to reduce strain on seams.
For a quick refresher on care symbols and washing guidance, this is a helpful reference: https://www.ginetex.net/en/
Quick “prevention reset” checklist (save this)
- Nails trimmed and filed, scratch option placed near the couch hot spot
- Washable throw protecting armrests and seat middle
- Pet zone set up within the family area
- Gentle washing and low-heat drying to preserve fiber strength
With these habits in place, your waterproof fabric patch and your overall pet-proof couch protection plan will go much further, and your living room can stay both inviting and polished.
Next, we will cover the moment every household hits eventually: when a patch is not enough, and how to decide whether to repair again or replace the cover for a cleaner, longer-term solution.
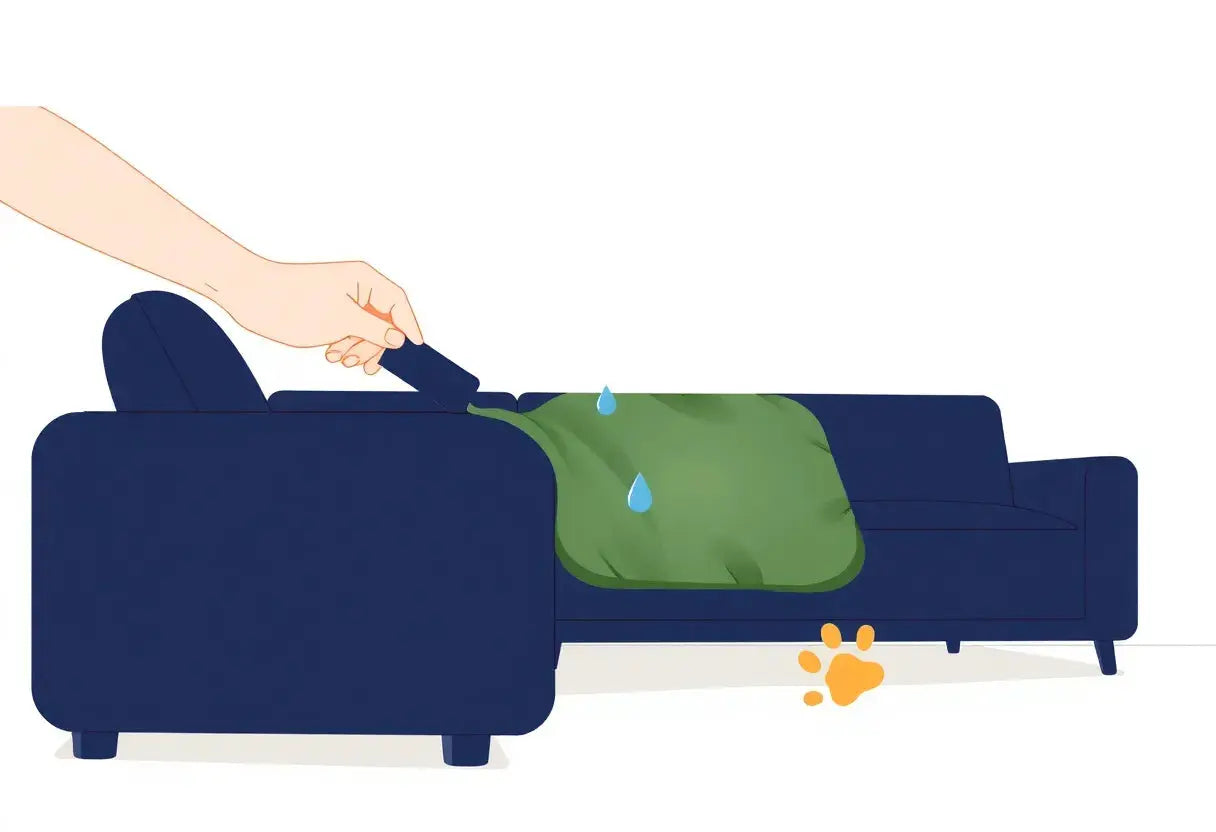
When a Patch Isn’t Enough: Repair vs. Replace (Simple Decision Guide)
You have already seen how to repair torn couch cover fast with a waterproof fabric patch. Most of the time, that is the perfect family-friendly fix: quick, tidy, and back to normal life. But if the cover is failing in multiple places, a patch can start to feel like you are chasing problems instead of solving them.
Here is a simple, calm decision guide to help you choose the smartest next step.
Quick decision framework: Patch or replace?
Patch is best when all (or most) of these are true:
- The tear is small and clean, like a snag, a single rip, or a small claw puncture that has not spread.
- The fabric around the tear still feels strong, not thin, fuzzy, or “paper-like.”
- The damage is on a flat panel, not right on a load-bearing seam (common stress zones: seat edge, armrest edge).
- The cover still fits well, with no constant pulling or shifting that keeps re-stressing the same spot.
In these cases, using a waterproof fabric patch is a practical upgrade: it restores function and helps keep spills and pet messes from working into the damaged area.
Consider replacement when you see these red flags:
- Thinning in multiple spots (for example, you can spot light through the fabric in more than one area, or it looks worn in several high-friction zones). Multi-point thinning usually signals end-of-life fabric, meaning new tears are likely even if one spot is patched.
- Repeated seam failures across panels. If the same seam splits again and again, it often points to fit or stress issues: the cover is too tight, constantly being tugged, or the seating area takes heavy daily load.
- The cover no longer fits correctly (slipping, twisting, or needing constant re-tucking). Poor fit increases friction and tension, which makes any repair less reliable over time.
If any of these sound familiar, replacement is often the more time-saving option, especially for busy homes that need dependable pet-proof couch protection day after day.
Mini scenarios (so you can decide in under a minute)
Scenario 1: “One clean rip after a toy snag.”
Your cover looks great overall. The tear is on the back panel, away from seams.
Best choice: Patch. This is exactly what a repair torn couch cover method is for.
Scenario 2: “Cat corner: the same armrest keeps getting shredded.”
You patch, it holds briefly, then the next scratch catches the edge again.
Best choice: Patch plus protection, or replace that layer. Consider stepping up to an anti-scratch couch cover designed for daily claw contact. Patching alone is fighting the symptom, not the cause.
Scenario 3: “Seams are popping on the seat and the back.”
Multiple seam splits usually mean ongoing tension, heavy load, or a cover that does not fit the sofa shape well.
Best choice: Replacement, or at least a better-fitting full-coverage cover. Repeated seam failure is a strong clue that stress is distributed across the wrong areas.
Scenario 4: “Vintage or premium sofa, and you are worried about residue.”
You want a non-damaging solution that respects the piece.
Best choice: Be cautious with adhesives that could transfer to the underlying upholstery. When in doubt, it is worth getting professional upholstery advice for delicate fabrics or heirloom pieces, especially if the original upholstery is at risk.
Scenario 5: “Office or coworking space: it needs to look polished, always.”
Downtime is expensive, and you need easy cleaning between users.
Best choice: Replacement with durable, easy-clean protection. A fresh, full-coverage solution prevents frequent patchwork and helps keep the space looking consistent and professional.
If you are leaning toward replacement, make it count
If you are replacing because the cover is worn, slipping, or repeatedly tearing, choose something that reduces your maintenance long-term: full coverage, easy-clean, and designed to handle real-life friction.
Explore full-coverage options for everyday protection: https://frenchcovers.com/collections/sofa-couch-covers
Next up: the questions everyone asks before they patch (or upgrade)
Now that you know when to patch and when to replace, the next section answers the most common concerns, like whether a waterproof fabric patch holds up after washing and how big your patch should be for the strongest repair.

So, there you have it. In just ten minutes, you can repair a torn couch cover with a waterproof fabric patch, blending the fix so it looks intentional and securing it for daily life. By diagnosing the tear, prepping the surface, and applying the patch with care, you’ve restored both function and style. Pairing this quick repair with simple pet-proofing habits—like nail care and washable throws—creates a powerful defense, letting you enjoy a beautiful, welcoming living room without constant worry.
Remember, a patch is a brilliant save, but for areas under constant siege, a dedicated protective layer is the ultimate strategy for lasting peace of mind. Need a longer-lasting, pet-friendly solution today? Upgrade your protection with an anti-scratch couch cover and keep your living room looking clean with less daily effort—pick your size and color now. Your home is meant for making memories, not for managing messes.
FAQs: Quick Patch Fixes and Pet Friendly Couch Protection
Busy home and pet life can be tough on upholstery. In this guide, we showed how to repair torn couch cover damage in about 10 minutes using a waterproof fabric patch, plus simple habits and protection upgrades to keep your space looking polished and family ready.
Q: Can I patch a torn couch cover without sewing? A: Yes. The article walks you through a no sew repair torn couch cover method using a waterproof fabric patch: clean, dry, align, press, and let it set for a fast 10 minute fix. For the exact prep and placement steps, see Quick 10 Minute Patch Method.
Q: Will a waterproof patch stay on after washing? A: It can, if you follow the article’s key steps: apply the waterproof fabric patch to a fully clean, fully dry surface and press firmly along the edges so water cannot lift them. For wash friendly tips and curing time reminders, review Care and Washing Tips After Patching.
Q: How big should the patch be compared to the tear? A: The article recommends sizing your waterproof fabric patch larger than the tear so it fully reinforces the area, not just the split itself, which helps the repair torn couch cover last longer. For sizing guidance and edge placement, see Patch Sizing and Placement.
Q: What’s the best way to stop pets from tearing couch covers again? A: The post suggests pairing quick repairs with prevention: add pet-proof couch protection like an anti-scratch couch cover over high wear zones, plus regular nail trims and a designated scratch alternative. Start with the checklist in Long Lasting Pet Protection Tips.
Q: Is it better to repair a cover or replace it with a tougher, scratch-resistant option? A: If the tear is small or sudden, repair torn couch cover damage first with a waterproof fabric patch for a fast, budget friendly save, especially for premium or vintage pieces. If you are seeing repeated damage, the article recommends upgrading to pet-proof couch protection with an anti-scratch couch cover; compare options in Repair vs Upgrade Guide.